Spider Plant Troubleshooting
Spider Plant Root Rot: How to Diagnose It and Save the Plant
Spider plant root rot usually begins when the potting mix stays wet longer than the roots can handle. Early action matters because a plant can recover if enough firm healthy roots are still left.
Quick answer
- Wet soil plus drooping or yellowing is the main warning pattern.
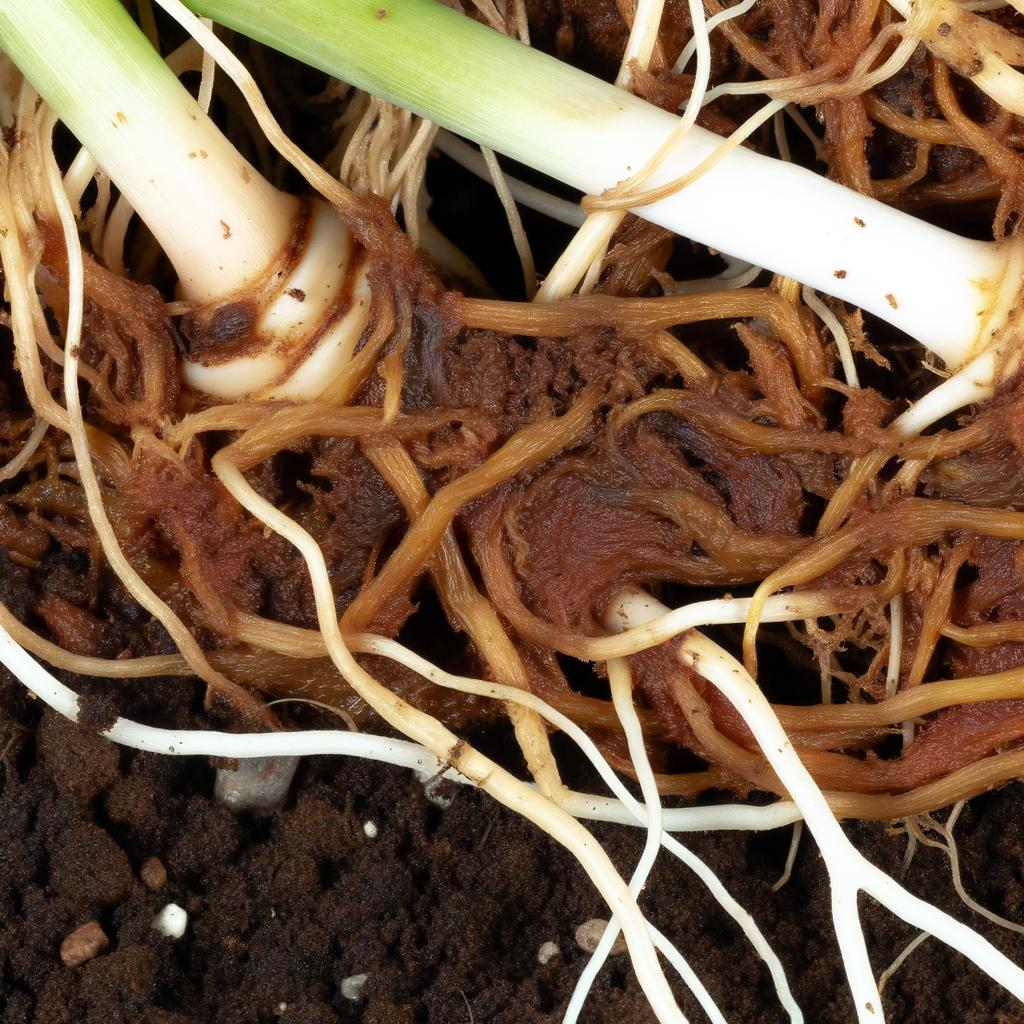
- Healthy roots are pale and firm. Rotten roots are dark and mushy.
- Trim damaged roots fast and repot into fresh airy mix.
- Do not resume heavy watering or fertilizer during early recovery.
- Recovery shows up as stable leaves and healthy new growth.
Root rot diagnosis table
Root rot often looks like a watering problem from above the soil line. The real distinction is whether the roots are still firm and functional or already decomposing.
| What you see | Most likely cause | Best first fix |
|---|---|---|
| Drooping plant in wet soil | Root stress from excess moisture | Stop watering and inspect the root ball as soon as possible. |
| Yellow leaves plus sour-smelling soil | Developing root rot | Unpot the plant, remove compacted wet soil, and check for dark mushy roots. |
| Black, mushy roots that break apart | Confirmed root rot | Trim rotten roots with clean scissors and repot into fresh fast-draining mix. |
| Brown tips, slow growth, and a pot that never dries | Chronic overwatering or dense soil | Improve drainage, reduce watering frequency, and consider a smaller pot or airier mix. |
| Mostly firm pale roots with only a few damaged sections | Early rot or minor root loss | Remove affected roots and resume a more conservative watering routine. |
What usually leads to root rot
1. Rewatering before the root zone dries enough
Spider plants tolerate some moisture, but they do not want a pot that stays saturated. The biggest risk comes from repeated watering before the mix has aired out enough between soakings.
2. Dense or exhausted potting mix
Old soil compacts over time and drains more slowly. Even a moderate watering routine can become risky once the mix stops letting air move through the root zone.
3. Pots that stay wet too long
Oversized containers, poor drainage, low light, and cool indoor temperatures all slow evaporation. When that happens, roots sit in stale moisture longer than they should.
4. Delayed intervention
Once roots begin to rot, the plant can keep declining even if you stop watering for a while. Severe cases usually require trimming and repotting, not just patience.
Recovery plan
- 1. Take the plant out of its pot and remove as much soggy soil as you can without ripping healthy roots.
- 2. Trim away every root that is black, mushy, slimy, hollow, or foul-smelling.
- 3. Use a clean pot with drainage holes and a fresh mix that drains faster than the old soil.
- 4. Repot at the same depth and water lightly enough to settle the mix, not soak it for days.
- 5. Keep the plant in bright, indirect light while it rebuilds roots.
- 6. Wait for new growth and a more predictable dry-down before resuming fertilizer.
Signs the plant still has a good chance
Better recovery odds
- At least part of the root system is still firm and pale.
- The crown is not mushy or collapsing.
- The newest leaves are still structurally intact.
- The rot is limited to part of the root ball.
More severe warning signs
- Most roots are black, hollow, or falling off.
- The center crown feels soft.
- The plant keeps collapsing after repotting.
- The soil line smells strongly rotten.
Related guides and fixes
Root rot usually connects back to drainage, watering habits, or stale soil. Use these pages to prevent it from returning and to choose better containers or supplies.