How to Care for Spider Plants: Complete Guide
Quick Answer: How to Care for Spider Plants
Spider plants need bright, indirect light, watering based on soil dryness, and well-draining soil. Water when the top inch or two of soil feels dry, use room temperature water, and ensure the pot has drainage holes. Keep temperatures in a comfortable household range and avoid harsh direct sun.
Essential Care:
- • Light: Bright, indirect sunlight
- • Water: When top inch of soil is dry
- • Soil: Well-draining potting mix
- • Temperature: 60-75°F (15-24°C)
Common Issues:
- • Brown tips: Use filtered water
- • Yellow leaves: Check watering schedule
- • No growth: Ensure adequate light
- • Root rot: Improve drainage
Frequently Asked Questions
How to revive a dying spider plant?
To revive a dying spider plant, trim off dead leaves, water thoroughly to rehydrate the soil, and then allow the soil to dry out before watering again. Move the plant to a spot with bright, indirect light, and avoid direct sunlight, which can burn the leaves. If the soil remains soggy or compact, you may need to repot the plant in fresh, well-draining soil.
- • Prune dead growth to focus energy on new growth
- • Water thoroughly then let soil dry completely
- • Provide bright, indirect light (east-facing window ideal)
- • Repot in fresh, well-draining soil if needed
What do overwatered spider plants look like?
An overwatered spider plant typically has yellow and drooping leaves, which may also develop brown tips or edges. The leaves can feel soft and limp because the waterlogged roots cannot transport water and nutrients effectively. You might also see signs of mushy stems or roots, a foul smell from the soil, or mold growth on the soil surface.
- • Yellowing and drooping leaves
- • Brown tips or edges
- • Soft, limp leaves
- • Mushy roots or foul soil smell
- • Mold growth on soil surface
How do I perk up my spider plant?
To perk up your spider plant, provide plenty of indirect sunlight, keep the soil moist but not wet, and give it a soak in tepid water if it's struggling. Let the soil almost dry out between waterings. Check the soil and lift the plant to see if it's getting dry. Many spider plants never get fed, so consider fertilizing during the growing season.
Can I cut the brown tips off my spider plant?
Yes, you can cut the brown tips off your spider plant to improve its appearance, but the brown parts will not turn green again. Use clean, sharp scissors to make a cut that follows the natural shape of the leaf. Sterilizing the scissors with boiling water or alcohol can help prevent infection. To prevent future browning, address the underlying cause, such as using filtered water, adjusting watering habits, or ensuring adequate humidity.
Spider plants, scientifically known as Chlorophytum comosum, are popular houseplants known for their graceful arching foliage and air-purifying qualities. These easy-to-grow plants are perfect for beginners and experienced gardeners alike. Learn about different spider plant types and how to propagate spider plant babies to expand your collection. For specific placement advice, check out our bathroom placement guide and hanging methods guide.
Expert Facts: Key Statistics About Spider Plants
At a glance
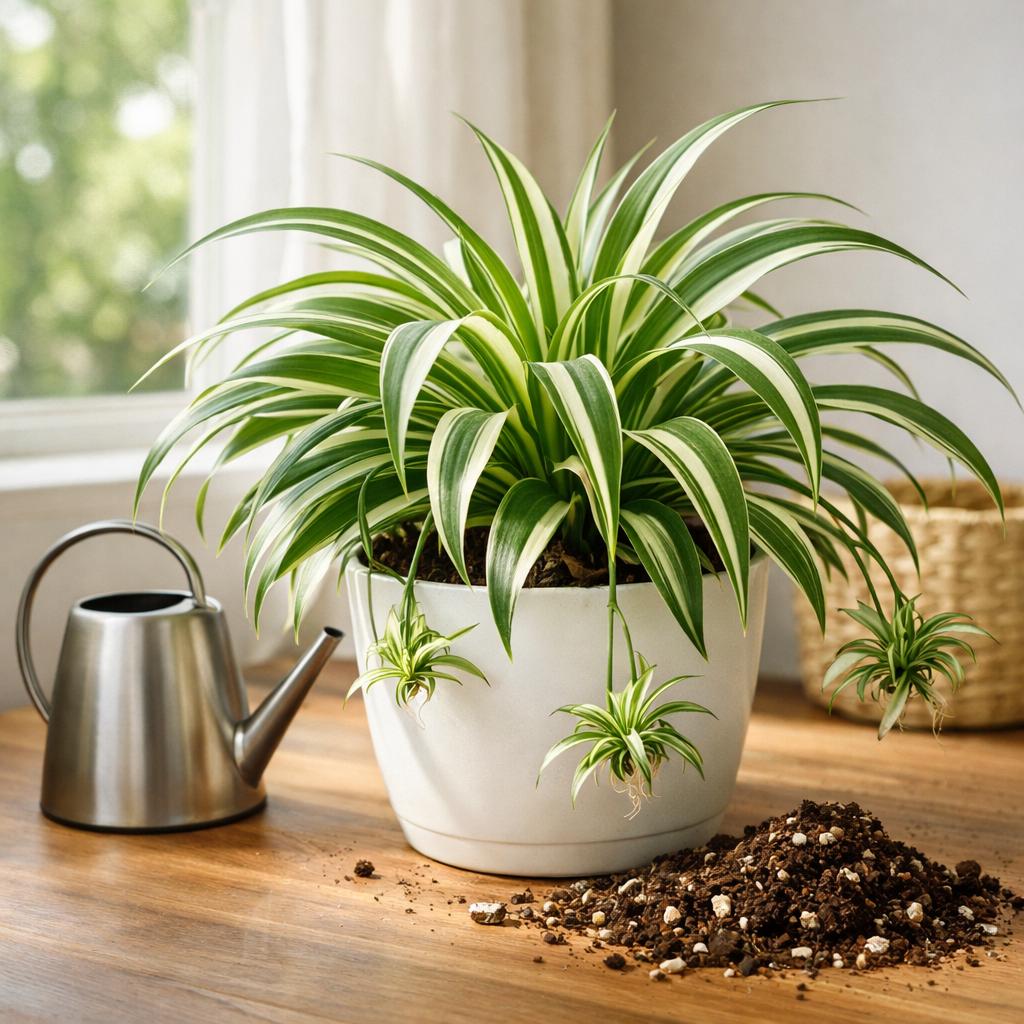
What a healthy spider plant setup looks like
Use bright indirect light, a fast-draining mix, and a pot with drainage. If your plant looks like this, focus on routine care rather than emergency fixes.
- Light
- Bright, indirect
- Water
- When top inch dries
- Soil
- Loose and draining
- Temperature
- 60 to 75°F
Step-by-Step Spider Plant Care
Step 1: Choose the Right Location
Place your spider plant in bright, indirect light. Avoid direct sunlight which can burn the leaves.
- • Best: Near a north or east-facing window
- • Good: 3-5 feet from a south or west window
- • Avoid: Direct afternoon sun
Step 2: Water Properly
Water when the top inch of soil feels dry to the touch.
- • Check soil moisture with your finger
- • Water thoroughly until excess drains out
- • Use room temperature water
- • Empty drainage tray after watering
Step 3: Use Well-Draining Soil
Plant in a well-draining potting mix to prevent root rot.
- • Use equal parts peat moss, perlite, and garden soil
- • Ensure pot has drainage holes
- • Repot when roots are visible at surface
Step 4: Maintain Proper Temperature
Keep temperatures between 60-75°F (15-24°C) for optimal growth.
- • Avoid cold drafts and heating vents
- • Maintain moderate humidity (40-60%)
- • Mist leaves occasionally in dry environments
Step 5: Fertilize During Growing Season
Feed your spider plant every 2-4 weeks from spring to early fall.
- • Use balanced, water-soluble fertilizer
- • Dilute to half the recommended strength
- • Stop fertilizing in winter
Understanding Spider Plants
Origin and Characteristics
Originally hailing from South Africa, spider plants are part of the Asparagaceae family. These fascinating plants have gained popularity as decorative additions to homes and offices worldwide due to their unique and striking appearance. Spider plants are known for their long, arching leaves that resemble spider legs, hence their name.
Key Benefits:
- • Air-purifying properties (removes formaldehyde, xylene, toluene)
- • Non-toxic to pets - perfect for pet-friendly homes
- • Safe for cats - learn about cat safety
- • Easy care and maintenance
- • Resilient and adaptable
Different Varieties
Traditional Variegated
Green leaves with white stripes - the most popular variety
Solid Green
Solid green leaves without variegation
Curly Spider Plant
Unique wavy leaves for added texture
For detailed information about each variety, visit our spider plant types guide.
Care Timeline & Growth Expectations
What to Expect: Month by Month
Understanding your spider plant's growth cycle helps you provide the right care at the right time. Here's what to expect throughout the year:
Spring (March-May)
- • Growth: New leaves emerge rapidly
- • Watering: Increase frequency as growth resumes
- • Fertilizing: Begin regular feeding schedule
- • Repotting: Best time if needed
- • Propagation: Spiderettes may appear
Summer (June-August)
- • Growth: Peak growing season
- • Watering: Most frequent watering needed
- • Fertilizing: Continue regular feeding
- • Flowering: White flowers may appear
- • Spiderettes: Abundant baby plants
Fall (September-November)
- • Growth: Slowing down
- • Watering: Reduce frequency gradually
- • Fertilizing: Stop feeding by late October
- • Light: May need brighter location
- • Preparation: Ready for winter dormancy
Winter (December-February)
- • Growth: Minimal to no new growth
- • Watering: Reduce significantly
- • Fertilizing: No feeding needed
- • Temperature: Keep above 50°F (10°C)
- • Patience: Plant is resting, not dying
Growth Expectations by Age
New Plant (0-6 months)
- • Size: 6-12 inches across
- • Growth: 2-4 new leaves per month
- • Spiderettes: None yet
- • Care: Focus on establishing healthy roots
Established Plant (6 months-2 years)
- • Size: 12-24 inches across
- • Growth: 4-6 new leaves per month
- • Spiderettes: May begin appearing
- • Care: Regular maintenance and feeding
Mature Plant (2+ years)
- • Size: 24-36 inches across
- • Growth: Steady, may slow slightly
- • Spiderettes: Abundant during growing season
- • Care: May need repotting and division
Light Requirements
Spider plants thrive in bright, indirect light. They can tolerate medium light but avoid direct sunlight which can burn the leaves. For detailed information about optimal placement and lighting conditions, see our complete light requirements guide.
Light Preferences:
- • Best: Bright, indirect light
- • Good: Medium light
- • Tolerates: Low light conditions
- • Avoid: Direct, harsh sunlight
Signs of Light Issues:
- • Too much light: Yellow or brown leaves, leaf burn
- • Too little light: Pale leaves, slow growth, leggy stems
Watering and Feeding
Watering Schedule
Proper watering is crucial for the health of spider plants. It's important to strike a balance between keeping the soil consistently moist and avoiding excessive moisture, which can lead to root rot. For comprehensive watering guidance including seasonal adjustments and troubleshooting, see our complete watering guide.
Watering Guidelines:
- • Water when the top inch of soil feels dry
- • Use room temperature water
- • Water thoroughly until excess drains out
- • Reduce watering in winter months
- • Avoid letting plant sit in standing water
Fertilizing
During the active growing season (spring to early fall), spider plants benefit from regular fertilization. For comprehensive fertilizing guidance including types, schedules, and application methods, see our complete fertilizer guide.
Fertilizing Tips:
- • Use balanced, water-soluble fertilizer
- • Dilute to half the recommended strength
- • Apply every 2-4 weeks during growing season
- • Stop fertilizing in fall and winter
- • Avoid over-fertilizing to prevent root burn
Soil and Potting
Spider plants are adaptable when it comes to soil, but they prefer a well-draining mix that retains moisture without becoming waterlogged. For detailed soil requirements, mixing recipes, and commercial options, see our complete soil guide.
Ideal Soil Mix:
- • Equal parts peat moss, perlite, and garden soil
- • Well-draining with good moisture retention
- • Slightly acidic to neutral pH (6.0-7.0)
- • Rich in organic matter
Pot Selection:
- • Choose pots with drainage holes
- • Size up gradually as plant grows
- • Consider hanging baskets for cascading effect
- • Repot when roots are visible at surface
For detailed repotting instructions and step-by-step guidance, see our complete repotting guide.
Need the right pot for your spider plant? Check our curated selection of the best pots and premium fertilizers for optimal growth.
Temperature and Humidity
Spider plants prefer temperatures between 60°F and 75°F (15°C and 24°C). They can tolerate slightly higher or lower temperatures, but extreme fluctuations should be avoided. For detailed temperature requirements and management, see our complete temperature guide.
- • Temperature: 60-75°F (15-24°C)
- • Humidity: 40-60% (moderate household levels)
- • Avoid cold drafts and extreme temperature changes
- • Mist leaves occasionally in dry environments
For detailed humidity requirements and solutions, see our complete humidity guide. For seasonal care, see our winter care guide and summer care guide.
Propagation and Repotting
Spider plants are excellent candidates for propagation, producing numerous spiderettes that can be easily rooted to create new plants. This process not only helps you expand your collection but also keeps the parent plant healthy and vigorous. Healthy spider plants may also produce beautiful white flowers that eventually develop into spiderettes.
Propagation Methods:
- • Soil propagation: Plant spiderettes directly in soil
- • Water propagation: Root spiderettes in water first
- • Air layering: Allow roots to form while attached to parent
For detailed step-by-step instructions, check out our spider plant babies guide.
Diagnostic Guide & Quick Fixes
Emergency Care Checklist
If your spider plant is showing signs of distress, follow this quick diagnostic guide to identify and fix the problem:
🚨 Immediate Action Required
Symptom: Mushy stems + foul odor
- • Diagnosis: Root rot
- • Action: Remove from pot immediately
- • Treatment: Cut away rotten roots
- • Repot: Fresh soil, clean pot
See our root rot emergency guide for detailed steps.
Symptom: Plant completely wilted
- • Diagnosis: Severe dehydration
- • Action: Water thoroughly
- • Treatment: Soak pot in water
- • Recovery: 24-48 hours
⚠️ Attention Needed
Symptom: Yellow leaves + wet soil
- • Diagnosis: Overwatering
- • Action: Stop watering
- • Treatment: Let soil dry completely
- • Prevention: Check soil before watering
Symptom: Brown tips + dry soil
- • Diagnosis: Underwatering/fluoride
- • Action: Water thoroughly
- • Treatment: Use filtered water
- • Prevention: Regular watering schedule
Diagnostic Flowchart
For detailed troubleshooting guides, see our dying plant guide, yellow leaves guide, and brown tips guide.
Common Problems and Solutions
Brown Leaf Tips
Usually caused by fluoride in tap water or low humidity
- • Use distilled or rainwater
- • Increase humidity around the plant
- • Trim brown tips with clean scissors
For a complete guide to fixing brown tips, visit our brown tips troubleshooting guide.
Yellow Leaves
Often indicates overwatering, underwatering, or nutrient issues
- • Check soil moisture levels
- • Ensure proper drainage
- • Review watering schedule
- • Consider repotting if root-bound
For a complete guide to fixing yellow leaves, visit our yellow leaves troubleshooting guide.
If your plant shows multiple symptoms of decline, see our spider plant dying guide for comprehensive diagnosis and revival techniques.
If yellow leaves are accompanied by mushy stems or foul odor, check our root rot treatment guide for emergency care instructions.
No Spiderettes
Mature plants may not produce babies due to various factors
- • Ensure adequate light exposure
- • Check if plant is pot-bound
- • Provide proper fertilization
If your plant has stopped growing entirely, see our not growing troubleshooting guide for comprehensive solutions.
Pest Infestations
Spider plants can attract common houseplant pests
- • Look for webbing, white cottony masses, or tiny moving dots
- • Isolate infected plants immediately
- • Use natural treatments first (neem oil, insecticidal soap)
- • Maintain proper humidity to deter spider mites
For complete pest identification and treatment, see our spider plant pests guide.
Frequently Asked Questions
How often should I water my spider plant?
Water when the top inch of soil feels dry. This is typically every 1-2 weeks, but frequency depends on light, temperature, and humidity. In summer, you may need to water more frequently; in winter, less often. Always check the soil moisture before watering.
What light conditions do spider plants need?
Spider plants thrive in bright, indirect light. They can tolerate medium light but avoid direct sunlight which can burn the leaves. They can survive in low light but will grow more slowly and may not produce spiderettes.
Are spider plants safe for pets?
Yes, spider plants are non-toxic to cats and dogs, making them perfect for pet-friendly homes. However, if pets chew on the leaves, they may experience mild stomach upset, so it's best to keep plants out of reach if your pets are prone to chewing.
Why are my spider plant leaves turning brown?
Brown tips on spider plant leaves are usually caused by fluoride in tap water, low humidity, or over-fertilization. Use distilled or filtered water, maintain proper humidity levels, and avoid over-fertilizing. You can trim brown tips with clean scissors.
How do I propagate spider plant babies?
Spiderettes can be propagated by placing them in water until roots form, then planting in soil, or by planting them directly in soil while still attached to the parent plant. Once they have roots, you can cut them free from the parent.
When should I repot my spider plant?
Repot when roots are visible at the surface or coming out of drainage holes, or when the plant becomes top-heavy. Spring is the best time for repotting. Choose a pot that's 1-2 inches larger than the current one.
How long do spider plants live?
With proper care, spider plants can live for 20+ years. They are perennial plants that will continue to grow and produce spiderettes throughout their lifetime. Regular repotting and division can help maintain their health and vigor.
Do spider plants purify the air?
Yes, spider plants are excellent air purifiers. They remove formaldehyde, xylene, and toluene from indoor air. According to NASA studies, they are among the most effective houseplants for improving indoor air quality.
Why isn't my spider plant producing babies?
Spiderettes typically appear when the plant is mature (1-2 years old) and conditions are optimal. Ensure adequate light, proper watering, and regular fertilization. Some plants may take longer to produce spiderettes than others.
Can spider plants grow in water?
Spider plants can grow in water for short periods, but they prefer soil for long-term health. If growing in water, change the water regularly and add a small amount of liquid fertilizer. For best results, transfer to soil once roots are established.
Do spider plants need pruning?
Yes, spider plants can benefit from pruning to maintain their shape and encourage new growth. For detailed pruning guidance, see our complete pruning guide.
Essential Spider Plant Care Products
Get the right tools and products to help your spider plant thrive. These expert-curated products will make caring for your spider plant easier and more effective.
Best Pots & Planters
Find the perfect container with proper drainage for your spider plant's growth.
Shop Pots →Premium Fertilizers
Feed your spider plant with the right nutrients for optimal health and growth.
Shop Fertilizers →Self-Watering Pots
Perfect for busy plant parents - consistent moisture without overwatering.
Shop Self-Watering →Pest Control
Keep your spider plant healthy with effective pest prevention and treatment.
Shop Pest Control →Live Spider Plants
Start your collection with healthy, expert-curated spider plants.
Shop Live Plants →Stands & Hangers
Display your spider plant beautifully with stylish stands and hangers.
Shop Display →Quick Navigation
Related Guides
-
Spider Plant Babies
Learn how to propagate and care for spiderettes
-
Spider Plant Types
Explore different varieties and their unique characteristics
-
Plant Care Glossary
Essential terms for spider plant enthusiasts
-
Repotting Guide
When and how to repot your spider plant
-
Soil Requirements
Choose the best soil mix for healthy growth
-
Transplanting Tips
Step-by-step transplanting instructions
-
Spider Plant vs Snake Plant
Compare spider plants to other popular houseplants
Ready to Get Started?
Now that you know how to care for spider plants, find the perfect one for your home.
Where to Buy Spider PlantsCommon Spider Plant Problems & Solutions
Brown Tips on Leaves
Most common issue caused by tap water chemicals.
- • Use filtered, distilled, or rainwater
- • Let tap water sit 24 hours before using
- • Increase humidity around the plant
- • Trim brown tips with clean scissors
Yellow Leaves
Usually indicates overwatering or underwatering.
- • Check soil moisture with your finger
- • Water when top inch is dry
- • Ensure pot has drainage holes
- • Avoid letting plant sit in water
Drooping or Limp Leaves
Often indicates underwatering or root issues.
- • Water thoroughly until excess drains out
- • Check for root rot if soil is wet
- • Repot in fresh soil if needed
- • Provide consistent watering schedule
No New Growth
Usually caused by insufficient light or nutrients.
- • Move to brighter location
- • Fertilize during growing season
- • Check if plant is rootbound
- • Ensure proper temperature (60-75°F)
Spider Plant Care Videos
Watch these helpful videos to see spider plant care in action and learn from plant experts.
Complete Care Guide
Learn all the basics of spider plant care from watering to lighting.
Troubleshooting Common Problems
Fix brown tips, yellow leaves, and other common issues.